AWS Series — Virtual Private Cloud: An Intranet of AWS
Let us see all about VPC — Virtual Private Cloud in AWS
What is VPC?
VPC is the virtual data center in the cloud. It is basically the logically isolated part of the AWS cloud where you can define your own network
You will have complete control of virtual network, including your own IP address range, subnets, route tables and network gateways.
It is Fully Customizable Network. You can leverage multiple layers of security including security groups and network access control lists, to help control access to Amazon EC2 instances in each submit.
For Instance,
Web — where it is public facing subnet. They are internet accessible. It would be in Port 80 or 443
Application — These are in Private Subnet. It can only speak to the web tier and database tier
Database — This is also Private Subnet. It can only speak to the application.
We can also create a hardware Virtual Private Network connection between your corporate data center and your VPC and leverage the AWS cloud as an extension of your corporate data center.
VPC Network
When we choose the VPC we can also choose the IP. We can use 10.0.0.0.0.0 or could use 172.16.0.0.0.0 or you can choose the common for home networking which is 192.168.0.0.0.0. But most corporations use 10.0.0.0.0.0. we can specify the number of digits we use using / and can be expressed as 10.0.0.0/16. this gives most number of IP addresses within which we can choose our servers to pick from.
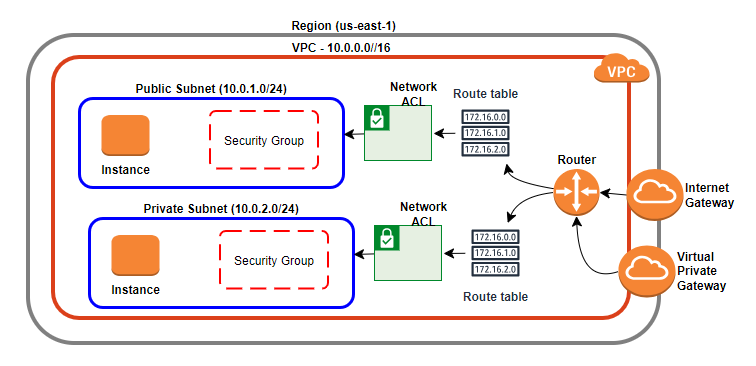
When we create the VPC, the Route Table and Network ACL is created. We first create public subnet through which we can access the application. The public subnet has the instance and security group attached to it which says who can update or access the instance.
We can choose our Private subnet to be 10.0.2.0/24 while the public subnet is 10.0.1.0/24. Virtual Private Gateway is used to access the instances in Private Subnet. While Internet Gateway can access the Public Subnet.
This is the basic network architecture of VPC with one public subnet and Private Subnet.
What actions can we perform with the VPC
- Launch instances of EC2 in Private / Public Subnets
- Choose Custom IP address ranges for each subnet
- Configure Route tables between subnets
- Create Internet Gateway and attach it to our VPC
- More security Control for our AWS resources
- We can create Access Control List for the subnets.
- We can also use Network Access Control Lists (NACLs) to block specific IP addresses.
When we provision Instance it asks for default or custom VPC. If we choose Default , then All subnets in default VC have a route out to the internet and public. Each EC2 instance has both public and Private IP Address. If we choose Custom, It is fully customizable and we may need to provide each and every setting which is time taking.
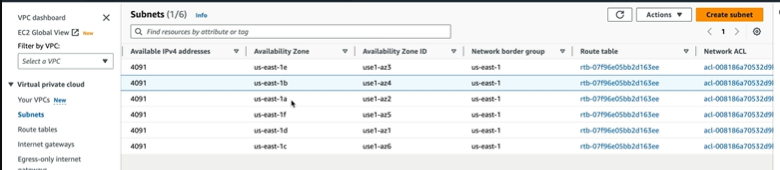
Subnet can be within one Availability zone and cannot span across the multiple availability zones.
Let us see how to build them.
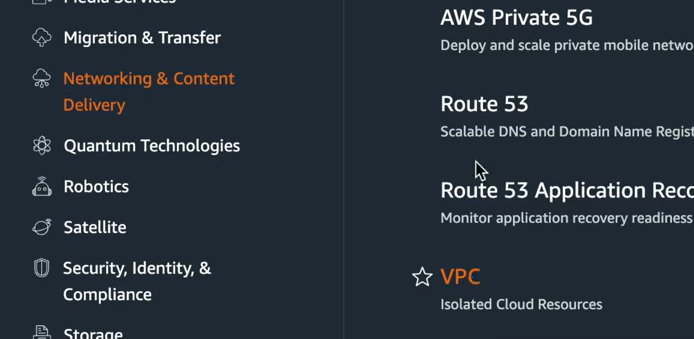
In the AWS Console, go to VPC under Networking & Content Delivery
We have the VPC by region
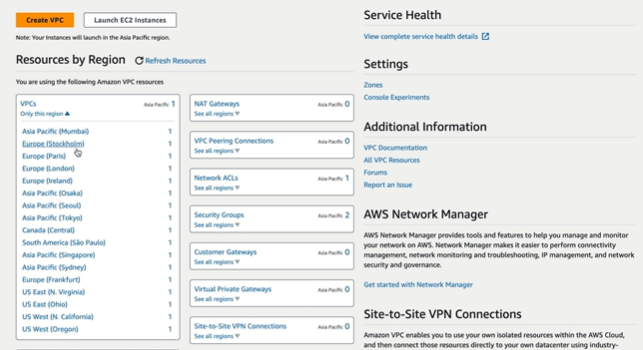
We can also select the region and can see the default VPC that is set up automatically for us.

If you see the VPC it has default route table and network ACL created for it.

If you look at the list of subnets, the Availability zones are listed and as you observe one subnet is associated to one availability zone.
To Create VPC, Click on Create VPC and it takes to the page
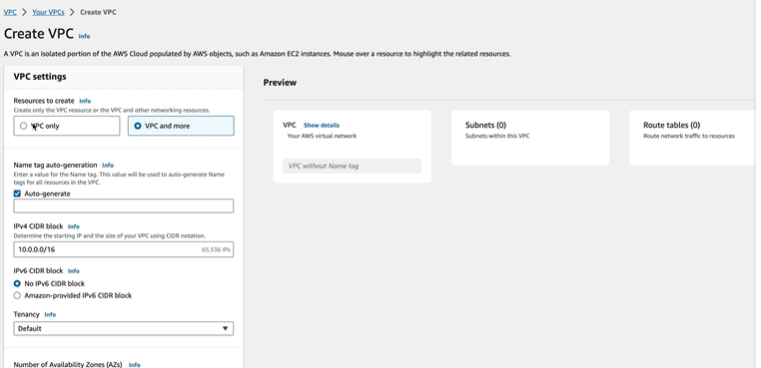
If you select VPC and more it shows one more section where we can select the route tables and subnets associations to the VPC.

If we select, VPC only, we enter the VPC name and select the IPV4 manual input or allocated via IPAM ( IP Address Manager, we can get the CIDR block from an IPAM pool but is limited to /16 and /28) .
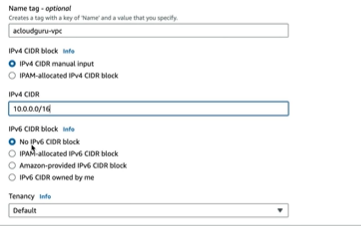
We can provide the CIDR block size and the block size which is after slash represents the block size and Tenancy would be Default and the other option is dedicated which means dedicated infrastructure.
What would be created by default when you create a VPC?
- We get Security Group automatically created corresponding to VPC.
- We also get Route Tables created
- The Network ACLs are also created by default
There are no subnets set up inside VPC by default. Let us create them.
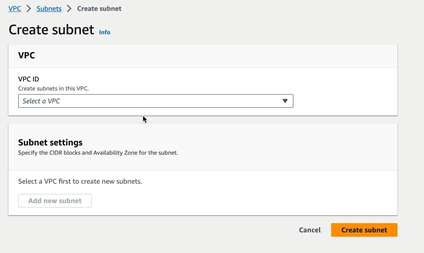
Select the VPC created already in the dropdown
Enter the name of the subnet ( Here we have given combination of CIDR and region to differentiate from others) and select the region
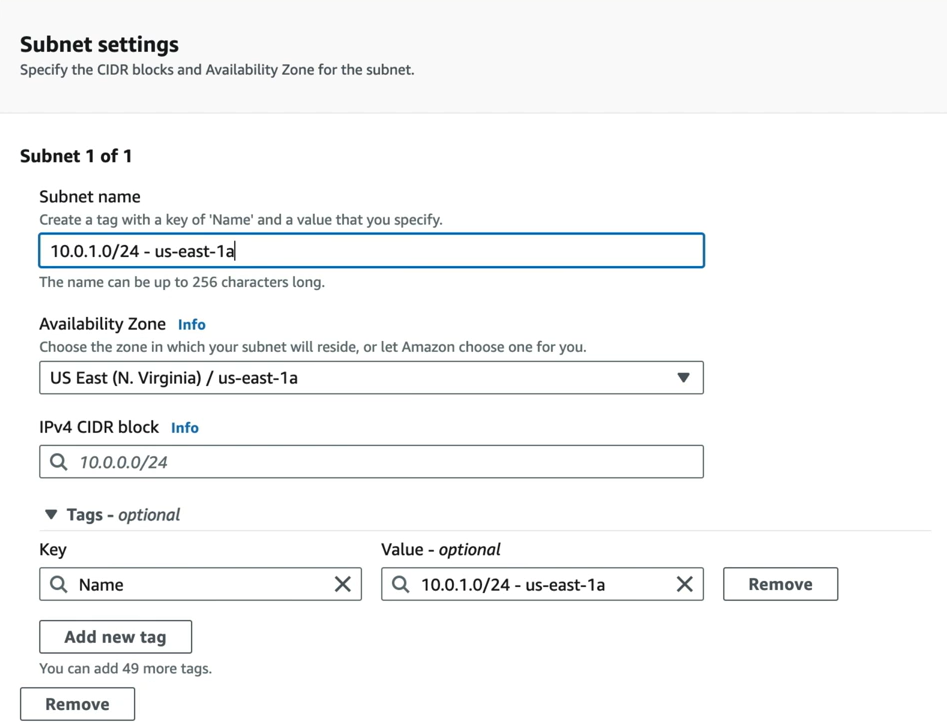
Also provide the CIDR block 10.0.1.0/24. Amazon reserves the first 4 subnet address and the last address which are 10.0.1.0 — for network address, 10.0.1.1 — for VPC router, 10.0.1.2 — DNS server, 10.0.1.3 — For future use and 10.0.1.255 — Network Broadcast Address.
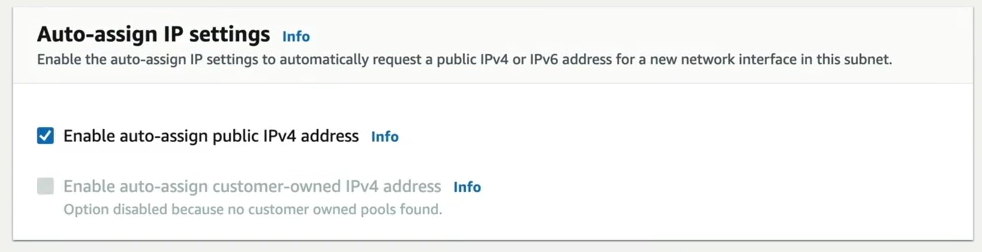
To make a subnet as Public Subnet —
Step 1 — To make the subnet as Public Subnet, we click on edit subnet and check the box Enable auto-assign public IPV4 address.
Step 2 — Create an Internet Gateway.
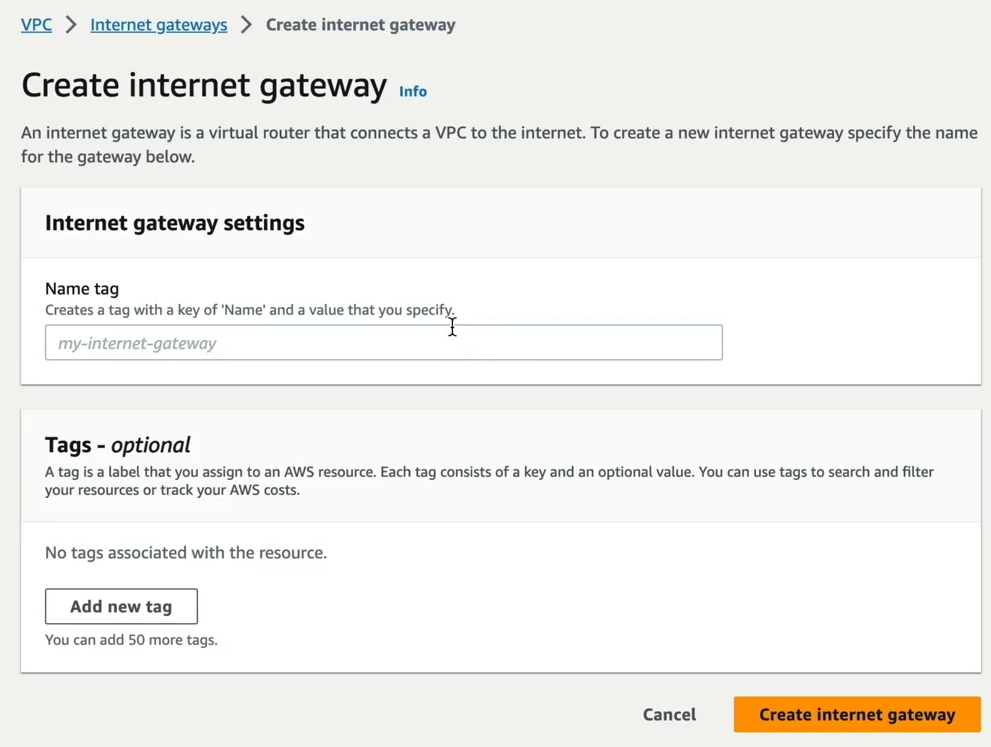
Specify the name of the Internet Gateway and Create. Then select the Internet Gateway and go to Actions > Attach to VPC

VPC can have only one Internet Gateway
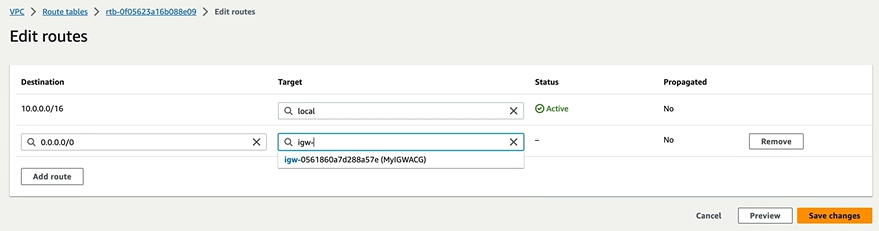
Next we need to Route to Internet. By default if we look at Route tables that got created for the VPC. It has 10.0.0.0/16 which is used for communicating internally within the VPC. When we go to Subnet Associations, the subnets that we created would be under the section Subnets without explicit associations.

Every time we create a new subnet, it’s got to be associated to this route table. We do not create route out to the internet at the route table, This makes the subnet we create to be public subnet by default which is a security concern.
Create Route Table
We create separate route table.

Once created, select the route table and click on edit route table. To route out to internet, we provide 0.0.0.0/0 and select the Internet Gateway that we created in the above step. and save changes.
Now we have to associate public subnet to this route table. Go to Subnet Associations and select the subnet that we would like to make it public. In this way, the subnet acts as a public subnet which has access to the internet gateway.

The public subnet in the main route table of VPC, it will not show the Subnet that is public in Subnet associations.
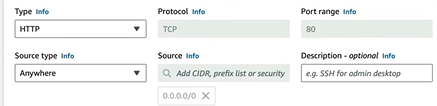
Create an EC2 instance with basic settings and go to Network Settings and select the VPC that we created and then choose the public subnet. This will auto assign IP to my EC2 instance. Go to Security Group and add security group rule then select the security type as HTTP select anywhere. This will allow the HTTP traffic from anywhere.
Launch the instance. You will observe the public IP assigned to the server.
Now we create a database server which should be in Private subnet. For this First we create Security Group for database server.
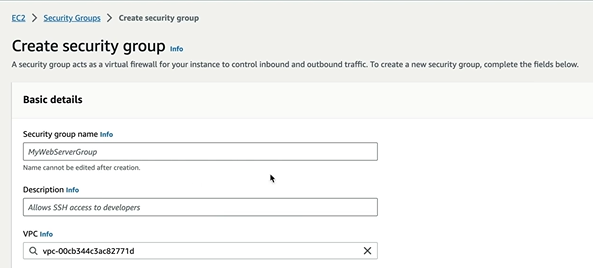
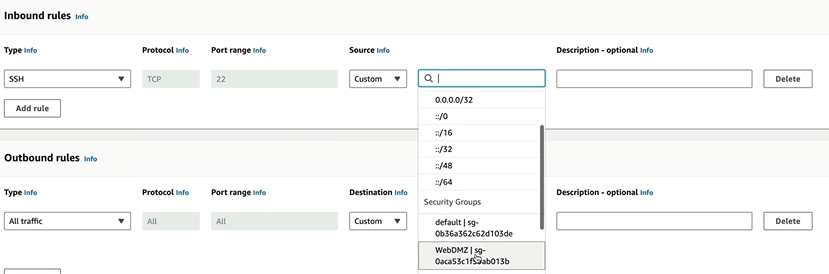
Give it a name and description and We can select the VPC that we created. For inbound rules, we can allow SSH traffic from custom source from the security group that we are using and create Security Group
Once we are done. Create an EC2 instance as we did before. In security group, select the one we just created. Launch the instance. We get the private IP address. When we try running commands to update the database, it does not work as it is in private subnet which is not connected to internet. How will we enable this?
NAT Gateway
Network Address Translation (NAT) gateway to enable instances in a private subnet to connect to the internet or other AWS services while preventing the internet from initiating a connection with those instances.
This should be provisioned in the Public subnet. This will act as means for the traffic to flow to internet through Network ACL and to the route table.
Facts about NAT Gateways —
- Redundant inside the Availability Zone
- Starts at 5 Gbps and scales currently to 45 Gbps.
- No need to patch
- Not associated to security groups
- Automatically assigned with public IP address
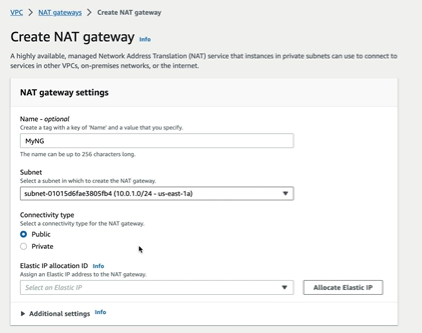
Create a NAT Gateway. Give it a name and select the public subnet. select the connectivity type as Public. Click on allocate Elastic IP. create a NAT Gateway.
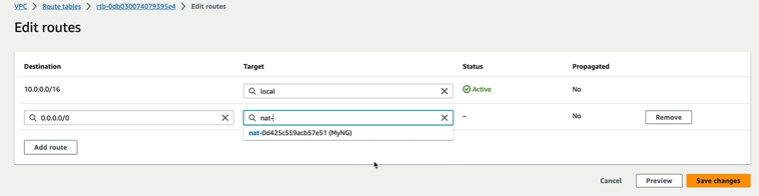
As we already discussed, all the subnets goes to the main Routing Table and so we go to the routing table and edit it. Add the Destination as 0.0.0.0/0 which means access anything but the target to be choosen as the NAT gateway that we created. This way the internet needed for my application is routed via the NAT Gateway. Then save changes.
now if you go to your EC2 created for Database server. Run the yum update -y it starts pulling the update.
Finally we built the architecture we planned in the beginning with the VPC, 2 subnets → 1 public and 1 private. Routing the traffic to the internet using Internet Gateway and Protecting the public Instance from the external traffic using NAT Gateway.
There are many more to learn!! Keep yourself updated!! Happy Learning!!