AWS Series — EC2: An AWS Virtual Machine
What is EC2?
Elastic Compute Cloud — -It is basically just a virtual server that sits in the cloud hosted on AWS.
- It is secure, resizable compute capacity in the cloud. Like a VM, that is hosted in AWS instead of your own data center.
- It is designed to make web-scale cloud computing easier for developers.
- It gives all the capacity you want when you need it.
- You are in complete control of your own instances that is not managed by AWS.
Best features of AWS —
- It is pay only for what you use.
- Select the capacity you need right now. Grow and Shrink when you need.
What changed with EC2?
With on-premises infrastructure, we have to estimate the capacity and do Long-term investment which is 3–5 years. Average time taken to provision a server would be 10–20 business days depending the environment. But with EC2 it can be instantaneous depending on the need.
EC2 Pricing Options
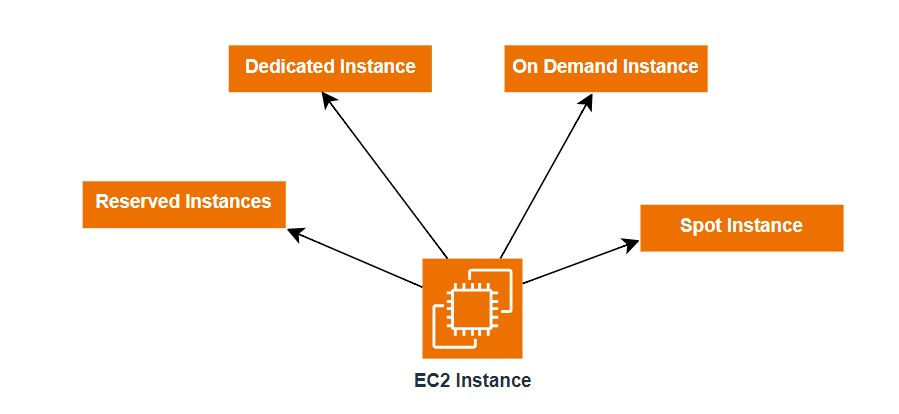
There are 4 different pricing options for EC2:
- On-Demand — Pay by the hour or the second, depending on the type of instance you run.
- Reserved — Reserved capacity for 1 to 3 years. Up to 72% discount on the hourly charge. Not only EC2 but can include server less like Lambda or Fargate.
- Spot — Purchase unused capacity at a discount of up to 90%. Prices fluctuate with supply and demand. They are like share prices.
- Dedicated — A Physical EC2 server dedicated for your use. The most expensive option.
Use-cases that suites On-Demand Instances —
- Flexibility — Low cost and flexibility of Amazon EC2 without any upfront payment or long-term commitment.
- Short-Term — Applications with short-term, spiky or unpredictable workloads that cannot be interrupted.
- Testing the water — Applications being developed or tested on Amazon EC2 for the first time.
Use-cases that suites Reserved Instances —
- Predictable Usage — Applications with steady state or predictable usage
- Specific Capacity Requirements — Applications that require reserved capacity
- Pay up Front — You can make upfront payments to reduce the total computing costs even further.
- Standard Rates — Up to 72% off the on-demand price
- Convertible Rates — Up to 54% off the on-demand price. Has the option to change to a different type of equal or greater value.
- Scheduled Reserved Instances — Launch within the time window you define. Match your capacity reservation to a predictable recurring schedule that only require a fraction of a day, week or month.
Reserved Instances operate at regional level
Use-cases that suites Spot Instances —
- Flexible — Applications that have flexible start and end times
- Cost Sensitive — Applications that are only feasible at vey low compute prices
- Urgent Capacity — Users with an urgent need for large amounts of additional computing capacity.
Use-cases that suites Dedicated Hosts —
- Compliance — Regulatory requirements that may not support multi-tenant virtualization.
- Licensing — Great for licensing that does not support multi-tenancy or cloud deployments
- On-Demand — Can be purchased on-demand(hourly)
- Reserved — Can be purchased as a reservation for up to 70% off the on-demand price.
How to Create EC2 Instance?
Step -1 — Login to your Amazon Console and search for EC2 in the search bar or Go to Compute > EC2
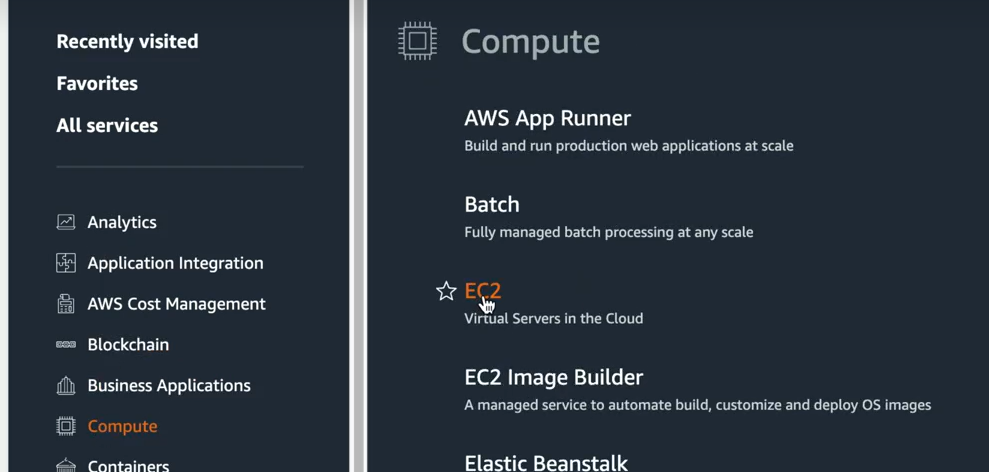
EC2 instance is the region based. So make sure to select the region that suites your need.
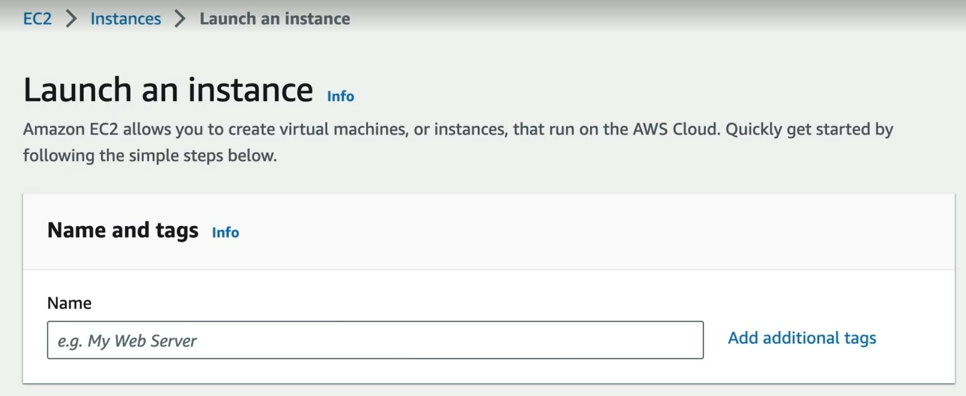
Step — 2 :Click on Launch Instance. You can provide the name of the instance.
Step — 3 : Select the OS for our virtual machine.
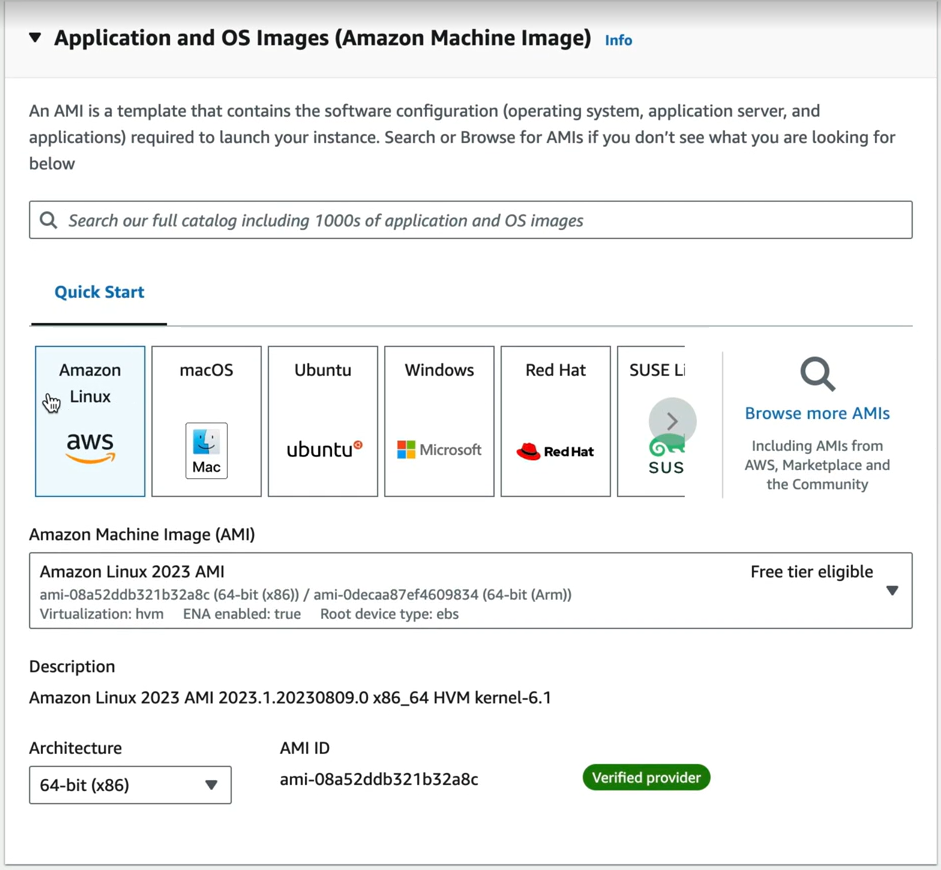
We have different OS like Linux, Ubuntu, macOS, Windows, Red Hat etc., Choose the one which is of preference. Once we select it populates respective AMI. Amazon Linux AMI is eligible for free tier.
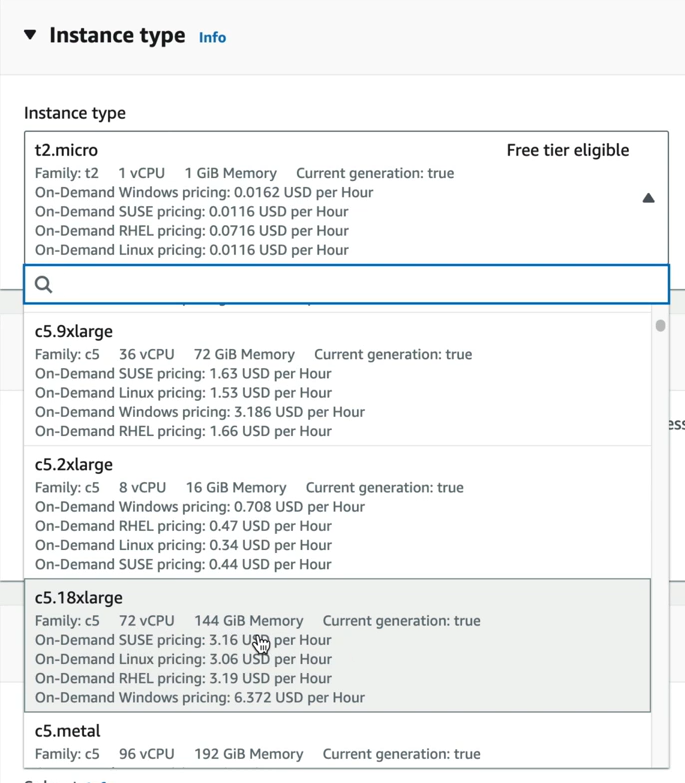
Step — 4: We can choose Instance type which is the size of the EC2 instance. If your application is big and have large data, Go for the one you think will suite your need.
Step — 5: Next select the Key Pair. Key pair is for accessing your EC2 instance just like username and password. If you don’t have one, you would not be able to login to your EC2 instance.
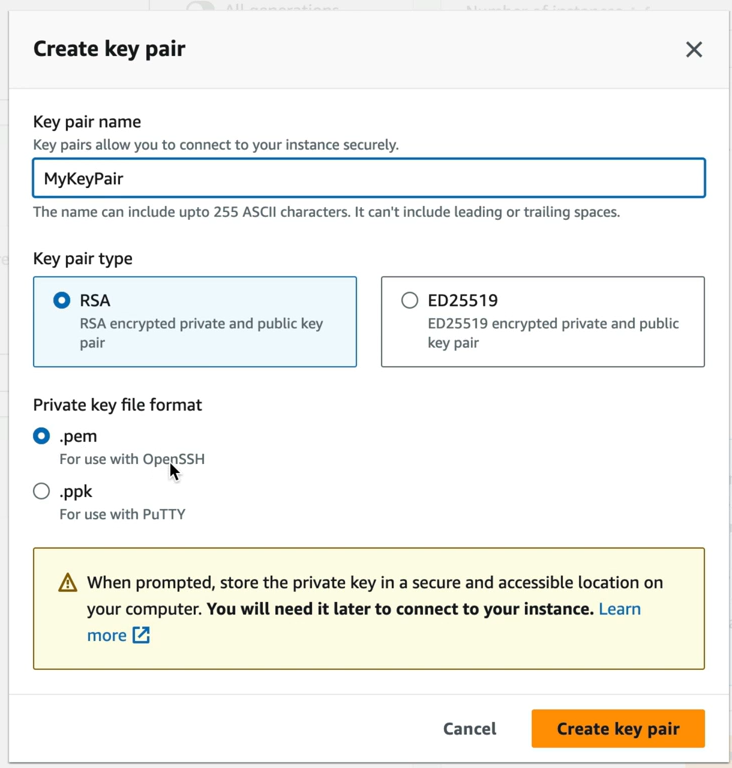
We are using standard encryption format which is pem
Step — 6: Choose the Network Settings. When we create EC2 instance, it would always be behind the security firewall. We can choose the Security Group as create new or choose existing one. By Default, it is allowing all the traffic. We can also allow the HTTP and HTTPS if it is webs server

Step — 7: Configure storage is the EBS volume to be attached to my EC2 instance. By default, it would be 8 GB.

Step — 8: Click on Launch Instance with all these basic settings. This will create a new instance. When we go to Instances, we find the instance state.

Hurray!! My instance is up and running.
Now select the Instance and click on connect to connect to the instance.
To Terminate the Instance, Select the instance and go to Actions > Terminate Instance.
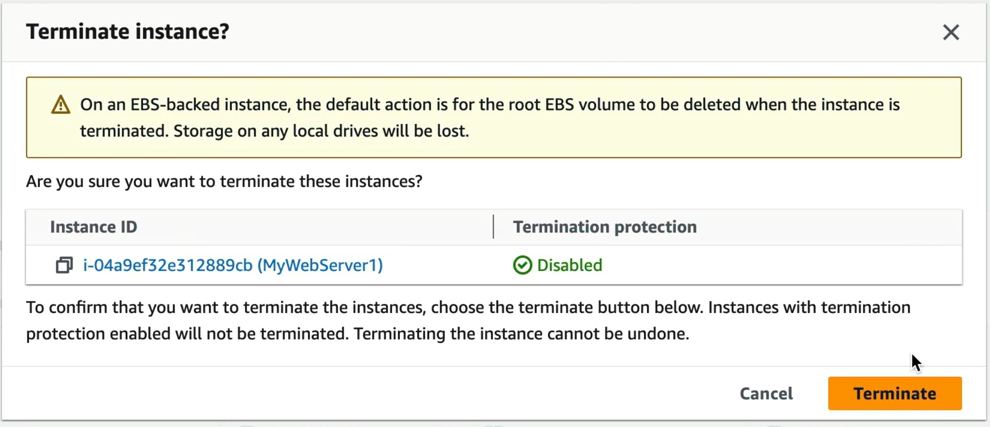
Click on Terminate and it will be terminated.
The AWS will not charge for any instance that is in Stopped or Terminated Status.