AWS Series — EC2 Instance Bootstraping Hands on Demo
EC2 Instance Bootstrapping
Introduction
Amazon Elastic Compute Cloud (Amazon EC2) is a web service that provides secure, resizable compute capacity in the cloud. In this lab, we configure a web server to corporate standards, noting how much effort it can take to walk through these steps manually each time. We then learn how to bootstrap an instance using a user data script, allowing us to automatically build servers. By the end of this demo, the user will understand what an EC2 bootstrap script is and how to use one to automate one of the most tedious parts of server building.
Solution
Log in to the AWS Management Console . Make sure you’re in the N. Virginia (us-east-1) Region.
Manually Install Software on webserver-01
Set Up Script
- Return to the AWS Management Console and navigate to EC2.
- On the EC2 dashboard, click Launch instances.
- In the Launch an instance section, under Name and tags type webserver-01.
- Scroll down to the Application and OS Images (Amazon Machine Image) to select the Ubuntu logo, click the dropdown menu to select Ubuntu Server 24.04 LTS (HVM), SSD Volume Type.
- Scroll down to the Instance type, and click the dropdown menu to select t3.micro.
- Under Key pair (login), click the dropdown and select Proceed without a key pair (Not recommended) Default value.
- Under Network settings, click Edit and enter the following information:
- Auto-assign public IP: Select Enable from the dropdown menu.
- Firewall (security groups): Choose Create security group.
- In the name provide EC2SecurityGroup and select the default VPC in dropdown.
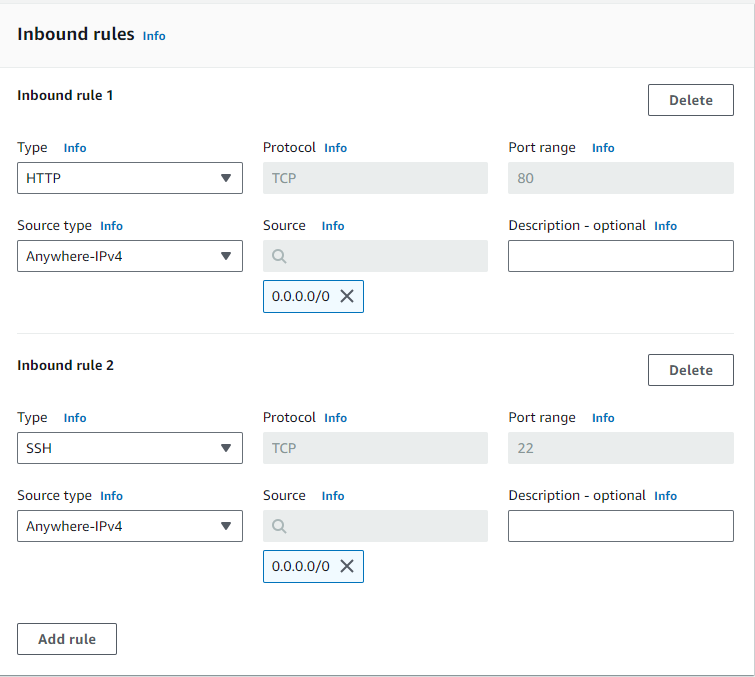
- Add the below Inbound rules
- Leave the outbound rule as All traffic, 0.0.0.0/0.
Launch the instance.
Set Up apache2
- From the AWS Management Console, navigate to EC2.
- In Resources at the top, click Instances (running).
- Select the webserver-01 instance and click Connect.
- Select EC2 Instance Connect and click Connect to open a terminal window.
Update and install the packages, using the same password as before, when prompted:
sudo apt-get update && sudo apt-get upgrade -y
Note: It may take a few minutes to complete.
Install the apache2 web server:
sudo apt-get install apache2 -y
Once installed, return to the AWS Management Console to confirm the apache2 install was successful:
- Click the checkbox next to webserver-01.
- Scroll down to the Details section of the page and copy the Public IPv4 address.
- Paste the IP address in the address bar of a new browser tab.
Note: If using the open address link, you may receive an error that the site can’t be reached. This is because the link defaults to HTTPS instead of HTTP. In the address URL, change HTTPS to HTTP to load the Apache2 default welcome page.
Set Up the AWL CLI Tool
- Return to the terminal window and install the unzip tool:
sudo apt-get install unzip -y
Download the AWS CLI tool:
curl "https://awscli.amazonaws.com/awscli-exe-linux-x86_64.zip" -o "awscliv2.zip"
Unzip the file:
unzip awscliv2.zip
Install the AWS CLI tool:
sudo ./aws/install
Verify AWS CLI version 2 has been installed:
aws --version
To edit the web page’s index.html file, you'll need to grant user access to the file:
sudo chmod 777 /var/www/html/index.html
To get instance metadata about the server’s Availability Zone, enter the following command Observe the Availability Zone is listed at the front of the username in the result:
curl http://169.254.169.254/latest/meta-data/placement/availability-zone
Note: If you don’t see any output, wait a moment and retry the command.
Add the Availability Zone, instance ID, public IP, and local IP instance metadata to the index.html file (paste all of this into the terminal):
echo '<html><h1>Bootstrap Demo</h1><h3>Availability Zone: ' > /var/www/html/index.html
curl http://169.254.169.254/latest/meta-data/placement/availability-zone >> /var/www/html/index.html
echo '</h3> <h3>Instance Id: ' >> /var/www/html/index.html
curl http://169.254.169.254/latest/meta-data/instance-id >> /var/www/html/index.html
echo '</h3> <h3>Public IP: ' >> /var/www/html/index.html
curl http://169.254.169.254/latest/meta-data/public-ipv4 >> /var/www/html/index.html
echo '</h3> <h3>Local IP: ' >> /var/www/html/index.html
curl http://169.254.169.254/latest/meta-data/local-ipv4 >> /var/www/html/index.html
echo '</h3></html> ' >> /var/www/html/index.html
Navigate back to the Apache web page, and refresh it to view the results of the changes you made.
Return to the terminal and install mysql:
sudo apt-get install mysql-server -y
Note: It may take a few minutes for MySQL to install.
Use a Bootstrap Script to Build webserver-02 and Debug Issues
Set Up the Script
- Return to the AWS Management Console and navigate to EC2.
- On the EC2 dashboard, click Launch instances.
- In the Launch an instance section, under Name and tags type webserver-02.
- Scroll down to the Application and OS Images (Amazon Machine Image) to select the Ubuntu logo, click the dropdown menu to select Ubuntu Server 24.04 LTS (HVM), SSD Volume Type.
- Scroll down to the Instance type, and click the dropdown menu to select t3.micro.
- Under Key pair (login), click the dropdown and select Proceed without a key pair (Not recommended) Default value.
- Under Network settings, click Edit and enter the following information:
- Auto-assign public IP: Select Enable from the dropdown menu.
- Firewall (security groups): Choose Select existing security group.
- Common security groups: Select EC2SecurityGroup from the dropdown menu.
- Under Advanced details, click the dropdown arrow to expand.
- Scroll down to Metadata version and select V1 and V2 (token optional).
- Scroll down to User data and paste in the following bootstrap script:
#!/bin/bash
sudo apt-get update -y
sudo apt-get install apache2 unzip -y
sudo systemctl enable apache2
curl "https://awscli.amazonaws.com/awscli-exe-linux-x86_64.zip" -o "awscliv2.zip"
unzip awscliv2.zip
sudo ./aws/install
echo '<html><h1>Bootstrap Demo</h1><h3>Availability Zone: ' > /var/www/html/index.html
curl http://169.254.169.254/latest/meta-data/placement/availability-zone >> /var/www/html/index.html
echo '</h3> <h3>Instance Id: ' >> /var/www/html/index.html
curl http://169.254.169.254/latest/meta-data/instance-id >> /var/www/html/index.html
echo '</h3> <h3>Public IP: ' >> /var/www/html/index.html
curl http://169.254.169.254/latest/meta-data/public-ipv4 >> /var/www/html/index.html
echo '</h3> <h3>Local IP: ' >> /var/www/html/index.html
curl http://169.254.169.254/latest/meta-data/local-ipv4 >> /var/www/html/index.html
echo '</h3></html> ' >> /var/www/html/index.html
sudo apt-get install mysql-server
sudo systemctl enable mysql
Click Launch instance.
Connect to and View webserver-02
- Once the instance launch has been successfully initiated, click View all instances.
- Click the refresh button, if webserver-02 is not displayed.
Note: It may take a few minutes for webserver-02to complete its configuration.
- Once the webserver-02 instance has passed status checks, select this instance, and click Connect.
- Select EC2 Instance Connect and click Connect.
- In the terminal, check if Apache was installed correctly. The output should display Active: active (running):
sudo systemctl status apache2
- Verify apache2 is running. The output should display a few apache2 processes:
ps aux | grep apache
Verify mysql is running:
sudo systemctl status mysql
Try using mysqld:
sudo systemctl status mysql
Check for any running mysql processes:
ps aux | grep mysql
Try to start the mysql service:
sudo systemctl start mysql
Note: These commands should all return an error that the mysql service was not found.
- Use curl to retrieve the user-data:
curl http://169.254.169.254/latest/user-data
At the bottom of the script, notice the following code:
sudo apt-get install mysql-server
- Observe the code is missing the -y flag needed for mysql to automatically install without a user prompt.
- Install mysql-server manually:
sudo apt-get install mysql-server -y
Enable the mysql service:
sudo systemctl enable mysql
Use a Fixed Bootstrap Script to Build webserver-03
Set Up the Script
- Navigate back to the EC2 dashboard, and click Launch instances.
- In the Launch an instance section, under Name and tags type webserver-03.
- Scroll down to the Application and OS Images (Amazon Machine Image) to select the Ubuntu logo, click the dropdown menu to select Ubuntu Server 24.04 LTS (HVM), SSD Volume Type.
- Scroll down to the Instance type, and click the dropdown menu to select t3.micro.
- Under Key pair (login), click the dropdown and select Proceed without a key pair (Not recommended) Default value.
- Under Network settings, click Edit and enter the following information:
- Auto-assign public IP: Select Enable from the dropdown menu.
- Firewall (security groups): Choose Select existing security group.
- Common security groups: Select EC2SecurityGroup from the dropdown menu.
- Under Advanced details, click the dropdown arrow to expand.
- Scroll down to Metadata version and select V1 and V2 (token optional).
- Scroll down to User data and paste in the following bootstrap script:
#!/bin/bash
sudo apt-get update -y
sudo apt-get install apache2 unzip -y
sudo systemctl enable apache2
curl "https://awscli.amazonaws.com/awscli-exe-linux-x86_64.zip" -o "awscliv2.zip"
unzip awscliv2.zip
sudo ./aws/install
echo '<html><h1>Bootstrap Demo</h1><h3>Availability Zone: ' > /var/www/html/index.html
curl http://169.254.169.254/latest/meta-data/placement/availability-zone >> /var/www/html/index.html
echo '</h3> <h3>Instance Id: ' >> /var/www/html/index.html
curl http://169.254.169.254/latest/meta-data/instance-id >> /var/www/html/index.html
echo '</h3> <h3>Public IP: ' >> /var/www/html/index.html
curl http://169.254.169.254/latest/meta-data/public-ipv4 >> /var/www/html/index.html
echo '</h3> <h3>Local IP: ' >> /var/www/html/index.html
curl http://169.254.169.254/latest/meta-data/local-ipv4 >> /var/www/html/index.html
echo '</h3></html> ' >> /var/www/html/index.html
sudo apt-get install mysql-server -y
sudo systemctl enable mysql
- This time, the -y flag for mysql has been added.
- Click Launch instance.
Connect to and View webserver-03
- Once the instance launch is initiated, click View all instances.
- Click the refresh button, if webserver-03 is not displayed
Note: It may take a few minutes for webserver-03to complete launching.
- While you are waiting for webserver-03 to complete its setup, check if the index.html file for webserver-02 has been configured correctly.
- Select webserver-02 from the Instances list, and copy the Public IPv4 address.
- Paste the IP address in a new browser tab to access the Apache web page. Observe the information that’s returned.
- Navigate back to the EC2 dashboard, and click the refresh button to check the status of webserver-03.
- Once the webserver-03 instance has passed its status checks, select this instance and click Connect.
- Select EC2 Instance Connect and click Connect to connect to the webserver-03 instance in a new terminal window.
- In the terminal, check if Apache was installed correctly. The output should display Active: active (running):
sudo systemctl status apache2
- Verify apache2 is running. The output should display a few apache2 processes:
ps aux | grep apache
Verify mysql was installed:
systemctl status mysql
- This time, it is running.
- Confirm mysql processes:
ps aux | grep mysql
- Verify AWS CLI tool was installed:
aws --version
- Navigate back to the EC2 dashboard and copy the Public IP address for webserver-03.
- Paste the IP address in a new tab to confirm the Apache web page for webserver-03.
Conclusion
Congratulations — you’ve completed this hands-on lab!